
Complete the following steps to successfull install OSC in a VMWare environment:
- Log on to vCenter Server using the vSphere Web Client as the root user.
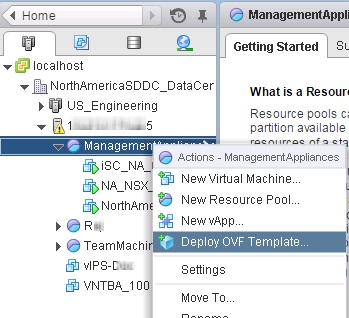
- In the vSphere Home tab, select Hosts and Clusters.
- Select the required node such as a resource pool, then right-click, and select Deploy OVF Template.
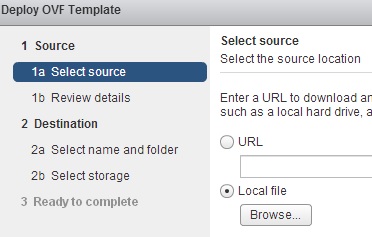
Deploy OVF Template - Click Browse and locate the .ova file.
Locate .ova File
You may be prompted to install and allow access to the VMware Client Integration Plug-In, if not already completed. - Review the details, and then click Next.
- In the Accept EULAs window, click Accept. and then click Next.
- Enter a relevant name for the OSC virtual appliance.
Note: The name must be unique within a data center.
- Select a folder or data center of where to deploy OSC, and then click Next.

Select a Folder - Select the required value from the Select virtual disk format drop-down list based on your requirement.
- Select the required datastore, and then click Next.

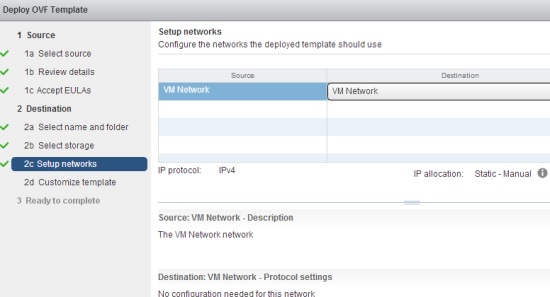
Select the Datastore - In the Setup networks section, select the required switch port group.
- The switch port group must enable OSC to communicate to the related applications such as the Security Manager, vCenter, NSX, and virtual security appliances. You must also be able to access the OSC web application as well as the OSC CLI from your client machine.
Setup Networks
- The switch port group must enable OSC to communicate to the related applications such as the Security Manager, vCenter, NSX, and virtual security appliances. You must also be able to access the OSC web application as well as the OSC CLI from your client machine.
- In the Customize template section, enter the network settings for the OSC appliance as shown below, and then click Next.
- Enter an IPv4 address for the OSC virtual appliance. IPv6 is not currently supported.
- Enter the subnet mask for the IP address.
- Enter the default gateway IP address.
- Enter the IPv4 addresses of DNS servers separated by a space. You can specify up to 2 DNS servers; one primary and the other secondary DNS server.

Enter the IP Addresses
- Review the information displayed in the Ready to Complete section, select Power on after deployment, and then click Finish.

Ready to Complete
To make any changes, click Back. - Monitor the installing in the Recent Tasks section.

Recent Tasks - Confirm successful installation by accessing the CLI as well as the web application.